2022 Dodge Challenger Parts & Mods Guide
A plain-English research reference covering every modification category for the 2022 Challenger. What each part does, how much horsepower to expect by engine (5.7L R/T, 6.4L Scat Pack, 6.2L Hellcat), which brands matter, install gotchas, and compatibility rules. Built for beginners.
# Dodge Challenger Parts Research Notes
Last Updated: April 18, 2026 (expanded with drag/track/Hellcat/fuel/exterior/ignition research)
Purpose: Comprehensive research on 2022 Dodge Challenger performance parts — to inform site content, part listings, buyer's guides, and blog posts. Focused on what a beginner needs to know: what parts do, why they matter, what they cost, and what gotchas exist.
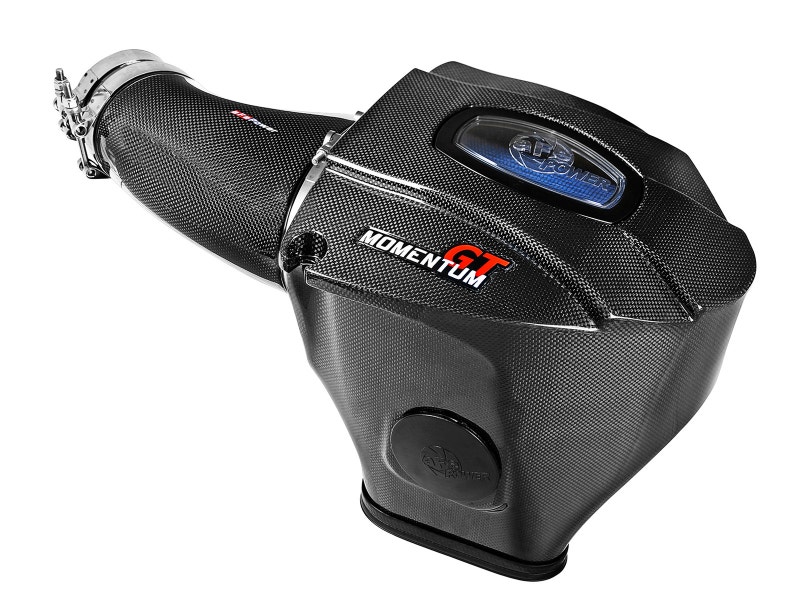
1. COLD AIR INTAKES (CAI)
What It Does
Replaces the restrictive factory air box with a larger-diameter intake tube that pulls cooler, denser air from outside the engine bay. Cooler air is denser, which means more oxygen molecules per cubic foot = better combustion = more power.
HP Gains by Engine
| Engine | Best Brands | HP Gain | Torque Gain |
|---|---|---|---|
| 5.7L R/T HEMI | aFe, JLT, K&N, BBK | +8–17 HP | +10–20 lb-ft |
| 6.4L Scat Pack HEMI | aFe, JLT, Mopar | +15–18 HP | +15–22 lb-ft |
| 6.2L Hellcat | aFe Carbon Fiber | +25–37 HP | +22–36 lb-ft |
Key Brands & Products
- aFe Power: Momentum GT, Magnum FORCE Stage-2. Known for rigorous dyno testing. Carbon Fiber option for Hellcat is premium.
- JLT Performance: Popular series 2 CAI — strong mid-range torque focus.
- K&N: Typhoon system — well-known brand, easy install, good filter longevity.
- BBK Performance: Budget-friendly, bolt-on in ~30 min, no extra hardware needed.
- Mopar: OEM-quality, maintains warranty, less aggressive gains.
- Corsa: Carbon fiber intake option for 6.2L Hellcat.
Install Notes
- Most CAIs are 30–60 minute installs, no special tools.
- Some may trigger a check engine light due to MAF sensor sensitivity — tune may be needed.
- Sealed (enclosed) intakes maintain cooler air temps vs. open filters that can heat-soak.
- Pairs best with tune to maximize gains — tune alone on stock intake is significant, CAI + tune is better.
Site UX Recommendations
- Display "Does this require a tune?" clearly on each listing (most do NOT require one for basic install).
- Show HP ranges by engine size prominently.
- "Best First Mod" badge — CAI is the consensus #1 beginner purchase.
- Sound clips: Some intakes have a distinctive induction growl under hard acceleration.

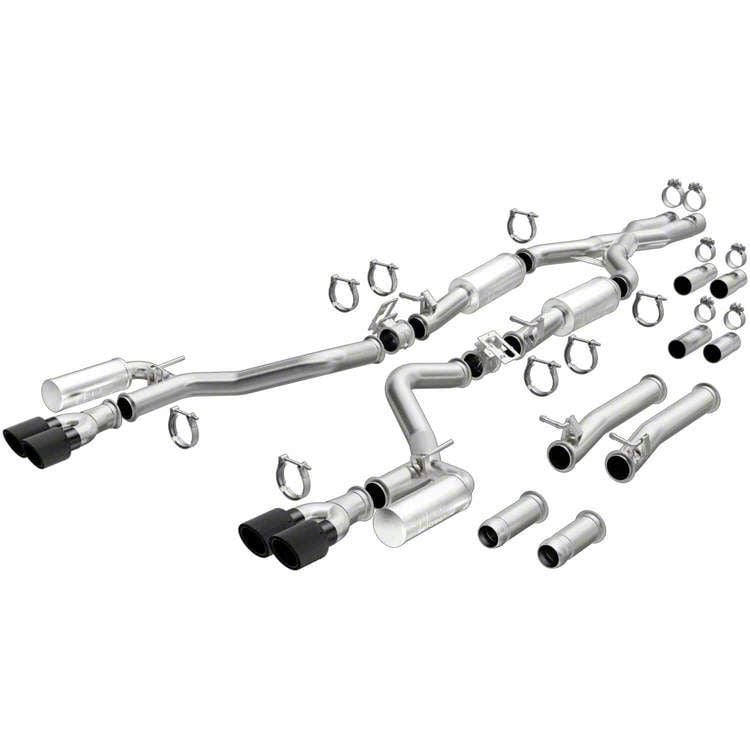
2. EXHAUST SYSTEMS
System Types — Explained
| Type | What It Replaces | HP Gain | Cost Range | Best For |
|---|---|---|---|---|
| Axle-Back | Mufflers + tips only (behind rear axle) | 1–5 HP | $300–$800 | Sound, budget buyers |
| Cat-Back | Catalytic converter to tips (includes muffler, mid-section) | 5–15 HP | $700–$2,000 | Best value performance+sound |
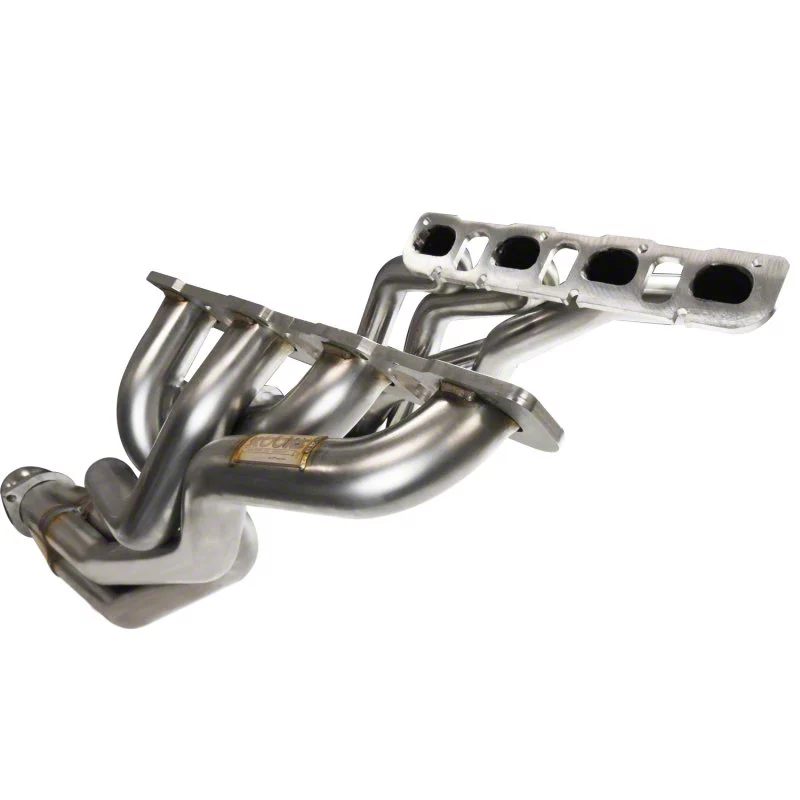
| Headers | Exhaust manifolds at engine (upstream of cats) | 15–40 HP | $600–$1,500 | Power-focused builds |
| Full Header-Back | Headers + mid-pipe + cat-back — entire system | 40–70 HP (w/tune) | $2,500–$5,000+ | Max power builds |
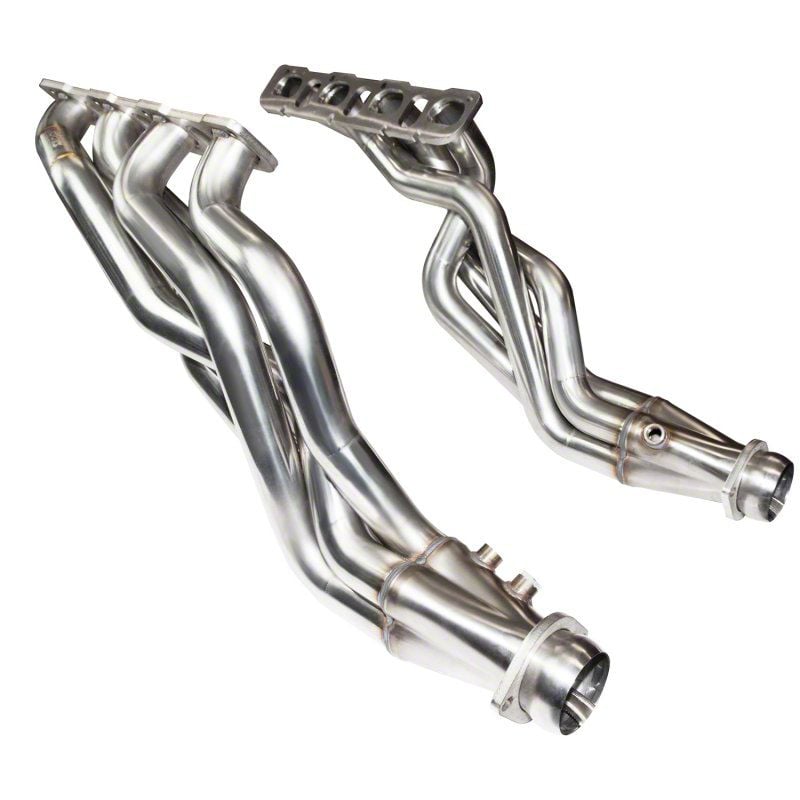
Shorty vs. Long Tube Headers
- Shorty headers (BBK, Flowmaster): Drop-in replacement for stock manifolds. Compatible with factory mid-pipe. +10–20 HP. Great street manners, pass smog in most states.
- Long tube headers (American Racing Headers, Stainless Works): Require matching aftermarket mid-pipe — will NOT bolt to factory mid-pipe. +25–40 HP (up to +50 HP with tune). Significantly louder, may not pass emissions. Best for serious power builds.
Key Brands
- Borla: ATAK (loudest), S-Type (moderate), Touring (subtle). Premium quality, lifetime warranty.
- Corsa Performance: Patented reflective sound technology — sounds aggressive under throttle, quiet at cruise.
- AWE Tuning: Touring and Track editions. Known for quality fit and finish.
- Flowmaster: American Thunder line. Iconic American muscle sound. Budget-friendly.
- MagnaFlow: Clean, deep tone. Good value.
- American Racing Headers (ARH): Long tube specialist for HEMI platform.
- BBK Performance: Strong shorty header option, powder-coated or ceramic.
Sound Character Guide
| Brand/Line | Sound Level | Character |
|---|---|---|
| Borla ATAK | Aggressive | Loud, raspy, race-bred |
| Corsa Xtreme | Moderate-Aggressive | Tech-tuned, resonance-free |
| Flowmaster Outlaw | Aggressive | Classic American muscle rumble |
| AWE Track | Aggressive | European sport tone |
| Borla Touring | Subtle | Refined, barely louder than stock |
| AWE Touring | Subtle | Daily-driver friendly |
| MagnaFlow Street | Moderate | Deep, throaty |
Critical Compatibility Rules
- Long tube headers CANNOT use factory mid-pipe — always sold as a set.
- Shorty headers work with factory OR aftermarket mid-pipes.
- Catless mid-pipes give max flow but fail emissions — "off-road use only."
- High-flow catted mid-pipes balance flow and street legality.
Site UX Recommendations
- Sound clips are essential — exhaust is #1 bought for sound.
- Sound Level rating badge (Quiet / Moderate / Aggressive / Extreme).
- Headers must show "Compatible Mid-Pipe Required" warning for long tubes.
- "Emissions Note" badge on catless components.
3. SUPERCHARGER KITS
Types of Superchargers
| Type | Examples | Power Band | Sound | Best For |
|---|---|---|---|---|
| Twin-Screw (positive displacement) | Whipple Gen 5, Magnuson TVS2650 | Strong low-to-mid torque, instant response | Whine under boost | Street driving, daily drivers |
| Roots (positive displacement) | Edelbrock E-Force | Similar to twin-screw | Aggressive blower whine | Similar to twin-screw |
| Centrifugal | ProCharger P-1SC-1, Vortech V-3 | Linear, builds with RPM | Turbo-like whistle | Track/high RPM use |
Power Numbers
| Kit | HP Gain | Engine | MSRP |
|---|---|---|---|
| Whipple Gen 5 3.0L | +200 HP | 6.4L Scat Pack | ~$9,500–$10,500 |
| Magnuson TVS2650 | +180 HP | 6.4L | ~$8,995 |
| Magnuson TVS2300 | +150 HP | 5.7L / 6.4L | ~$7,595 |
| ProCharger P-1SC-1 | +150 HP | 5.7L / 6.4L | ~$6,500–$7,500 |
| Vortech V-3 | +140–180 HP | 6.4L | ~$6,500+ |
Complete Kit vs. Tuner Kit — CRITICAL DISTINCTION
- Complete Kit: Includes blower + fuel injectors + fuel pump + tune + all hardware. Ready for a stock or lightly modified engine. Safe for beginners.
- Tuner Kit: Blower head unit ONLY. Assumes you already have custom fuel and tuning. NOT safe for beginners without extensive knowledge.
- Site must tag each product clearly. A beginner buying a Tuner Kit without knowing the difference can destroy their engine within minutes of driving under boost.
Required Supporting Mods
- Upgraded fuel injectors (sized for boost — typically 50–80% larger than stock)
- Upgraded fuel pump or pump booster (DeatschWerks, Walbro)
- MAP sensor upgrade (stock maxes at ~22 PSI)
- Custom ECU tune (MANDATORY — not optional)
- Colder-range spark plugs (prevent detonation)
- Lower thermostat / cooling upgrades (heat management critical)
Site UX Recommendations
- Red banner warning on all Tuner Kit listings: "Does not include fuel system or tune. For modified engines only."
- "What else do I need?" checklist on all supercharger pages.
- Kit type filter: Complete Kit / Tuner Kit.
- HP gain shown prominently — this is the #1 purchase driver.
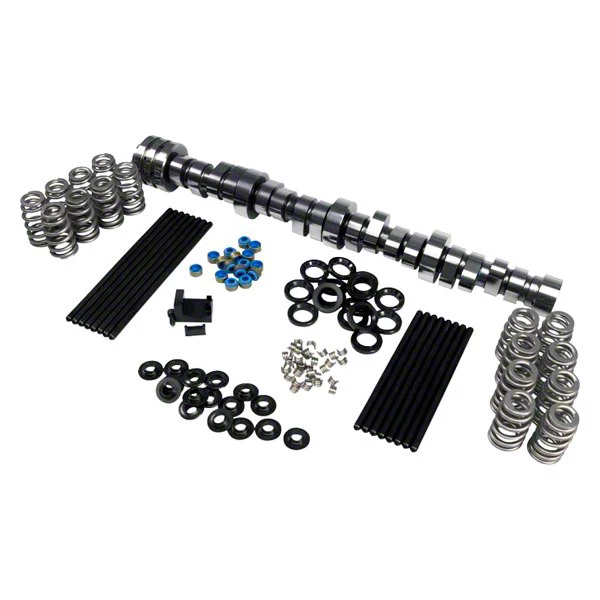
4. CAMSHAFT UPGRADES
What the Cam Does
The camshaft controls when and how far the intake/exhaust valves open. An aftermarket cam with more lift and duration lets the engine breathe better at higher RPM, fundamentally changing the power band and sound.
Cam Stages
| Stage | Profile | Idle | HP Gain (6.4L) | Street Use |
|---|---|---|---|---|
| Stage 1 | Mild (e.g., BTR 220/228) | Smooth | +30–50 HP | Daily driveable |
| Stage 2 | Moderate (lopey) | Noticeable lope | +50–70 HP | Street/weekend |
| Stage 3 | Aggressive | Rough/cammy idle | +70–100 HP | Mostly performance |
| Stage 4 | Race | Very rough | +100–120+ HP | Track only |
Required Supporting Parts (The Master Kit)
Every cam swap on an MDS-equipped engine REQUIRES:
- Non-MDS Lifters — MDS lifters will fail with an aftermarket cam profile
- Valve Springs + Retainers — Stock springs can't handle increased lift
- Pushrods (intake + exhaust) — Correct length for new lift specs
- VVT Limiter/Lockout — Control Variable Valve Timing with the new cam
- MDS Delete Plugs (qty 4) — Seal oil passages from removed MDS system
- Custom ECU Tune — Mandatory for idle, fuel, timing tables
MDS Exception
Manual transmission Challengers (Tremec TR-6060) do NOT have MDS. Skip: MDS lifters and MDS delete plugs. Same for 6.1L SRT8.
Key Brands
- BTR (Brian Tooley Racing): Stage 1–4 cams purpose-built for Gen III HEMI. Very popular in the community. BTR Stage 1 = 220/228 .590/.580 113.5 LSA.
- Comp Cams: HRT (Hemi Racing Technology) line. Widely available, good support.
- Texas Speed (TSP): Known for aggressive stages. Complete kits available.
- 797 Performance: Complete cam kits for 6.4L with everything included — plug-and-play minus the tune.
Sound Impact
A camshaft is arguably the biggest single change to how the car sounds at idle. A Stage 2+ cam gives the classic "potato-potato" HEMI lope that enthusiasts love.
Site UX Recommendations
- Error-level warning when cam added to build: "A camshaft swap requires a complete master kit. These are the required supporting parts..."
- Cam builds should auto-add a "You need a tune" warning.
- Checklist UI for master kit components when cam is selected.
- Stage filter (1/2/3/4) on cam listings.
5. ECU TUNERS & TUNING
Why a Tune is the Foundation of Every Build
A tune rewrites the engine's fuel, timing, and throttle maps. Almost every performance mod on the car is limited by the stock tune — even a cold air intake leaves HP on the table without tuning.
Tuner Options
| Tuner | Type | Skill Level | HP Gain (bolt-ons) | Price |
|---|---|---|---|---|
| DiabloSport inTune i3 | Handheld/mail-in | Beginner | +25–35 HP | ~$500–$700 |
| HP Tuners MPVI3 | Pro software | Advanced/shop | +35–50 HP | ~$400 (license) |
| Diablosport Predator 2 | Handheld | Beginner | +20–25 HP | ~$400 |
| SCT X4 | Handheld/mail-in | Beginner | +20–30 HP | ~$400 |
Handheld vs. Full Custom Tune
- Handheld tuners (DiabloSport, SCT): Come with pre-loaded tunes. Good for bolt-on builds. Easy DIY.
- Custom remote tune (HP Tuners): Tuner writes custom maps for your exact setup. Best results, especially for forced induction or cam builds.
- Forced induction or cam builds require a custom tune — a handheld pre-loaded tune is NOT sufficient.
Site UX Recommendations
- Mark tune as "Required" prerequisite on: cam builds, supercharger kits, forced induction.
- Mark as "Recommended" on: intakes, exhaust, headers, throttle bodies.
- Explain handheld vs. custom tune difference clearly for beginners.
6. THROTTLE BODIES
What It Does
The throttle body controls airflow into the intake manifold. Upgrading from the stock unit allows more air to flow at wide-open-throttle, marginally increasing peak power. More importantly, it can improve throttle response.
Sizing by Engine
| Engine | Stock TB Size | Upgrade Size | HP Gain |
|---|---|---|---|
| 5.7L R/T | 80mm | 85–90mm | +8–12 HP |
| 6.4L Scat Pack | 87mm | 92–95mm | +8–12 HP |
| 6.2L Hellcat | 92mm | 95mm+ | +5–8 HP |
Key Brands
- BBK Performance: 87mm CNC ported TB — best known in this space. Plug-and-play.
- Mopar: OEM+ option from Dodge Performance Parts.
- Modern Muscle Performance: Direct-fit, CNC machined.
- aFe Power: 90mm and 80mm options with plug-and-play installation.
Notes
- TB upgrade gains are modest standalone but compound with CAI + tune.
- Diminishing returns on very large TBs if intake manifold is stock.
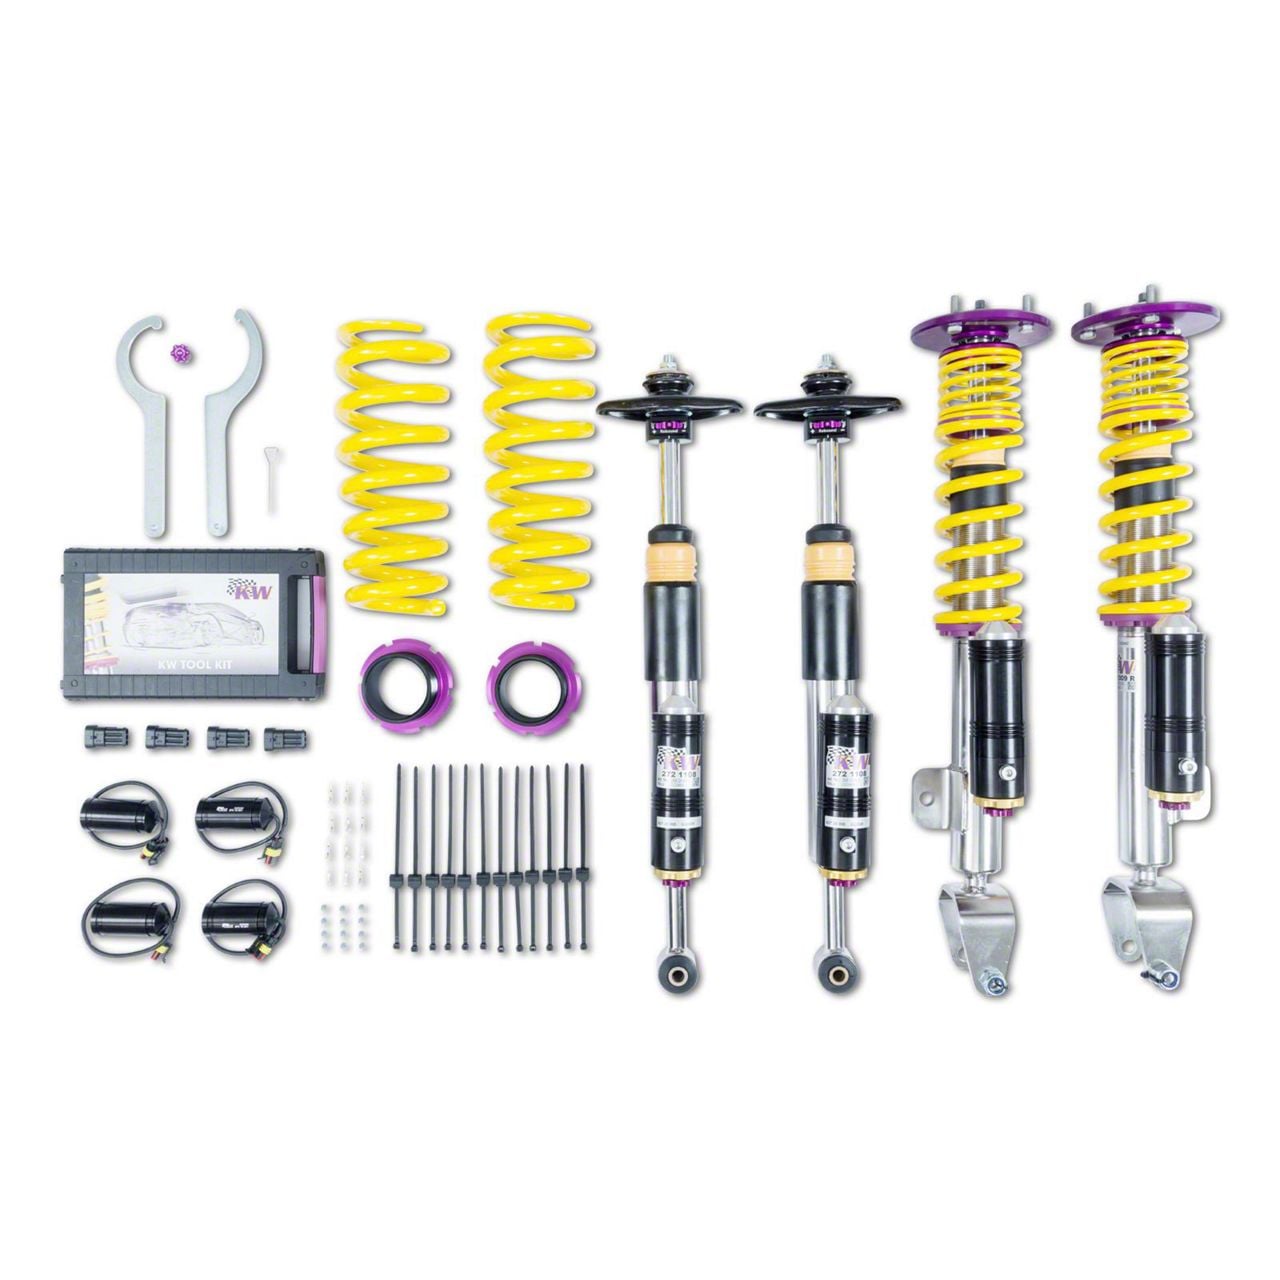
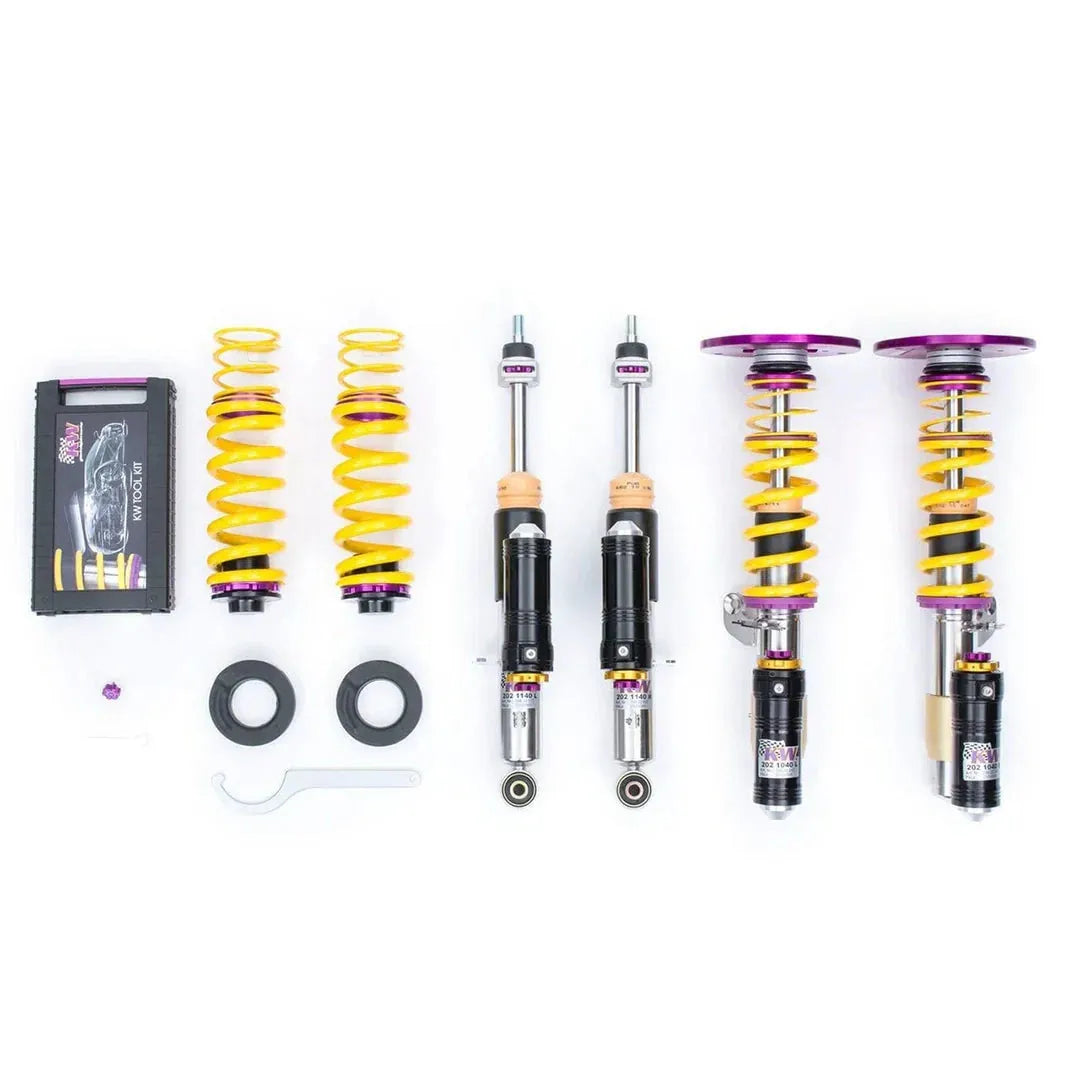
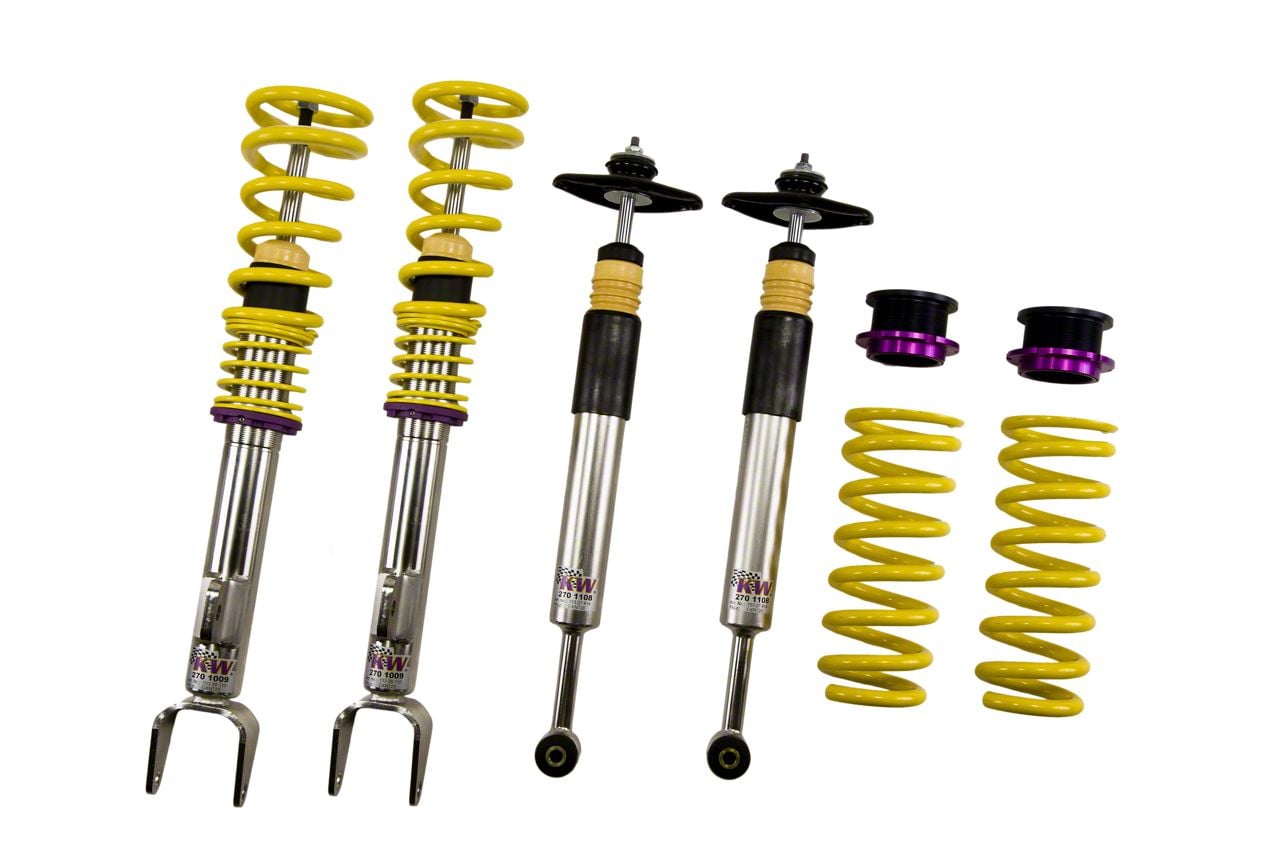
7. SUSPENSION
Lowering Springs vs. Coilovers
| Option | Drop | Ride Quality | Adjustability | Cost | Best For |
|---|---|---|---|---|---|
| Lowering Springs | 1–2" fixed | Firm but daily-driveable | None | $200–$600 | Street, daily driver |
| Coilovers | 0.5–3" adjustable | Varies by brand | Height + damping | $800–$3,500 | Performance, track prep |
Key Brands — Lowering Springs
- Eibach Pro-Kit: Most popular. ~1" drop front, ~1.1" rear. Great balance of comfort and handling.
- Eibach Sportline: ~1.8" drop. More aggressive stance.
- H&R Sport Springs: German-engineered. Progressive rate for comfort + performance.
- KW Suspension: Premium German coilover and spring brand.
Key Brands — Coilovers
- BC Racing: Budget-friendly, adjustable. Good entry point.
- KW Variant 3: Three-way adjustable. Near-perfect street/track balance.
- Bilstein: Premium dampers. Used by Dodge themselves for performance packages.
- Pedders: Australian brand with strong HEMI platform presence. Full suspension kits.
- Ksport Kontrol Pro: Fully adjustable, great value.
Sway Bars
- Front sway bar upgrade: +68% stiffness vs. stock. Dramatically reduces body roll.
- Rear sway bar: +182% stiffness. Transforms cornering.
- Hotchkis, BMR Suspension, Whiteline are top brands.
- Sway bars have "the greatest positive effect" of any single suspension mod per community consensus.
Supporting Mods
- Strut Tower Braces: Tie front strut towers together, reduces chassis flex. Cheap and effective.
- Trailing Arm Brackets (Pinion Angle Adjusters): Required when lowering >1.5" to correct rear pinion angle and prevent driveline vibration.
- Alignment: Always required after any suspension change. Critical for tire wear and handling.
Install Order
- Springs/coilovers first
- Sway bars (front + rear)
- Strut brace
- Trailing arms / pinion angle (if dropped >1.5")
- Alignment (always last)
Site UX Recommendations
- Show stance/drop prominently (users buy primarily for look + handling).
- "Alignment required after install" badge on all suspension parts.
- Pinion angle warning for drops > 1.5".
8. BRAKES
When to Upgrade
Stock brakes are fine for normal street driving. Upgrade when:
- Power exceeds ~450–500 HP (heat fade becomes an issue)
- Track or autocross use
- Consistent hard braking / mountain driving
- Squealing, pulsation, or extended stopping distances
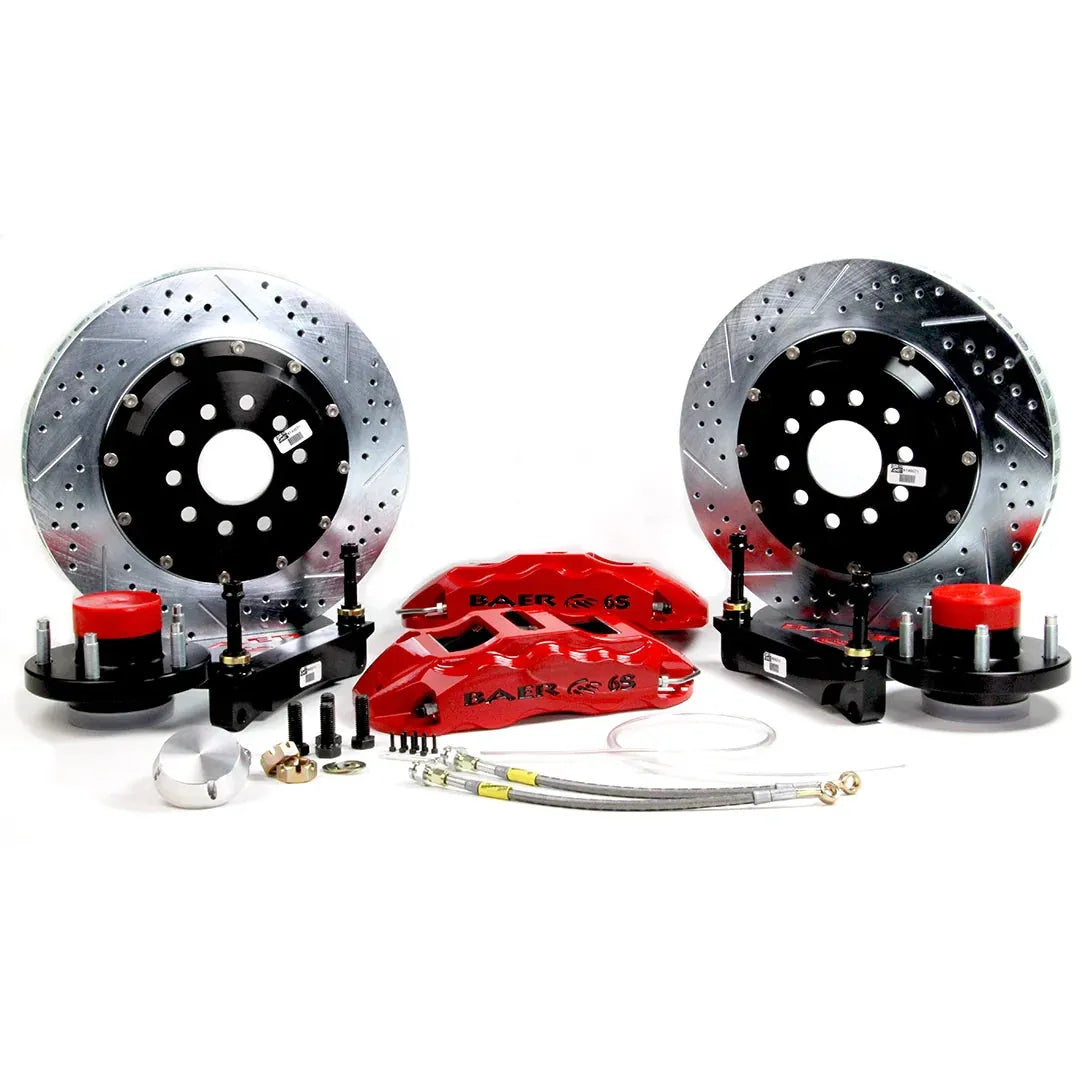
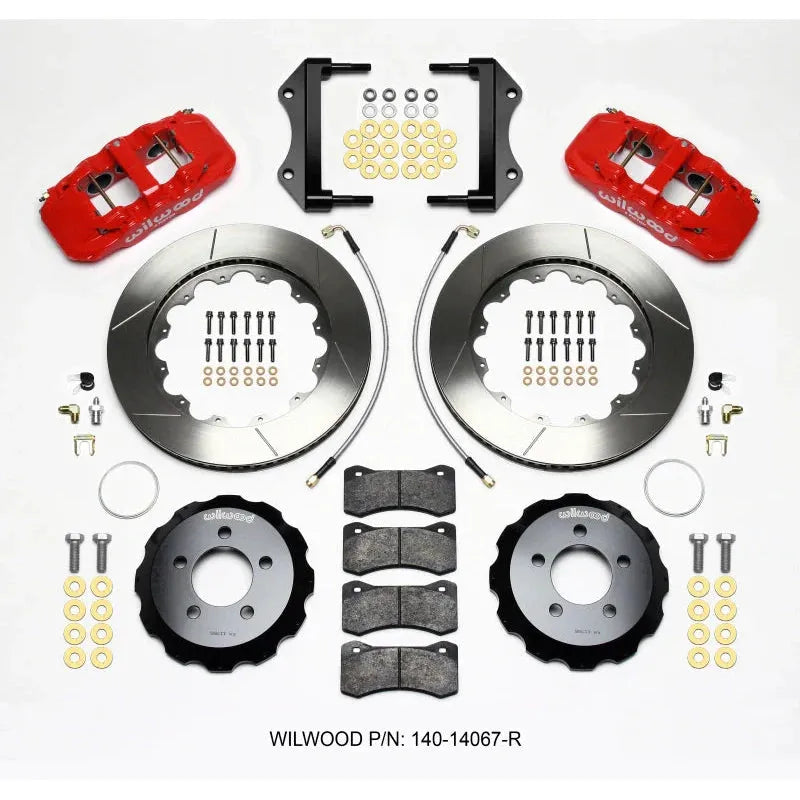
Upgrade Tiers
| Tier | Components | Cost | Best For |
|---|---|---|---|
| Budget | High-perf pads + slotted/drilled rotors | $300–$700 | Street, mild spirited driving |
| Mid-range | Big rotor upgrade + multi-piston calipers | $1,200–$2,500 | Frequent track days |
| Full BBK | Complete big brake kit (Brembo, StopTech, Alcon) | $2,500–$6,000+ | Serious track use |
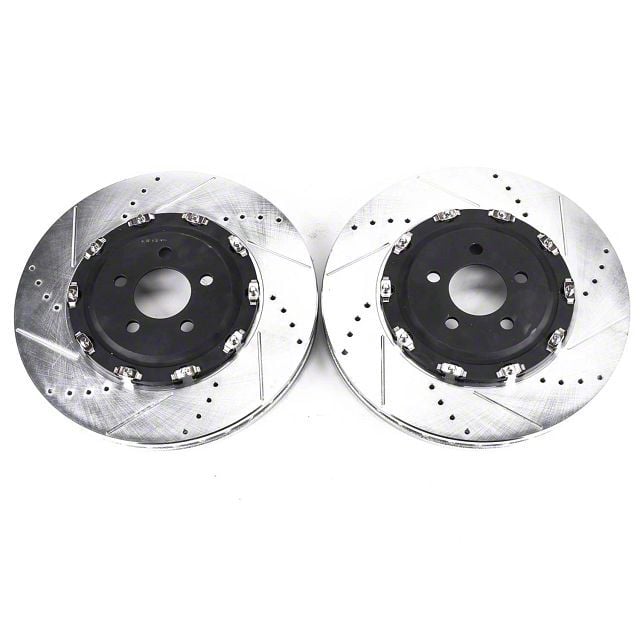
Rotor Types
- Drilled: Better wet-weather bite, but can crack under extreme heat. Street use.
- Slotted: Wipes debris from pad face, resists fade better. Track use.
- Drilled + Slotted: Combo — good street/occasional track.
- Solid performance rotors: Best thermal capacity, no weak points — pure track.
Key Brands
- Brembo: Gold standard for big brake kits. Factory equipment on Hellcat.
- StopTech: Excellent street/track balance. Trophy kits very popular.
- Alcon: UK-based race brake specialists. High-end.
- EBC Brakes: Strong pad range — GreenStuff (street), YellowStuff (sport), RedStuff (track).
- Hawk Performance: HPS (street), HP Plus (street/track), DTC compounds (race).
- Power Stop: Best value complete kits (rotors + pads packaged together).
Notes
- Brembo is factory equipment on Hellcat — upgrading a Hellcat means replacing the already-upgraded factory brakes.
- R/T and Scat Pack run smaller factory rotors — more room for upgrade.
- Bigger rotors may require wheel offset/fitment check. Some 18" wheels won't clear large BBK calipers.
Site UX Recommendations
- Power threshold warning: when build exceeds 450 HP → suggest brake upgrade.
- Show rotor type explanation (drilled vs. slotted vs. solid).
- Wheel clearance note: "Check wheel clearance before buying BBK."
9. WHEELS & TIRES
Stock Specifications (2022 Dodge Challenger)
| Trim | Wheel Size | Tire Size | Bolt Pattern | Hub Bore |
|---|---|---|---|---|
| R/T | 20x8 | 245/45R20 | 5x115mm | 71.5mm |
| Scat Pack | 20x9.5 | 255/45R20 | 5x115mm | 71.5mm |
| SRT Hellcat | 20x9.5 | 275/40R20 | 5x115mm | 71.5mm |
| SRT Super Stock | 20x11 | 315/40ZR20 drag radials | 5x115mm | 71.5mm |
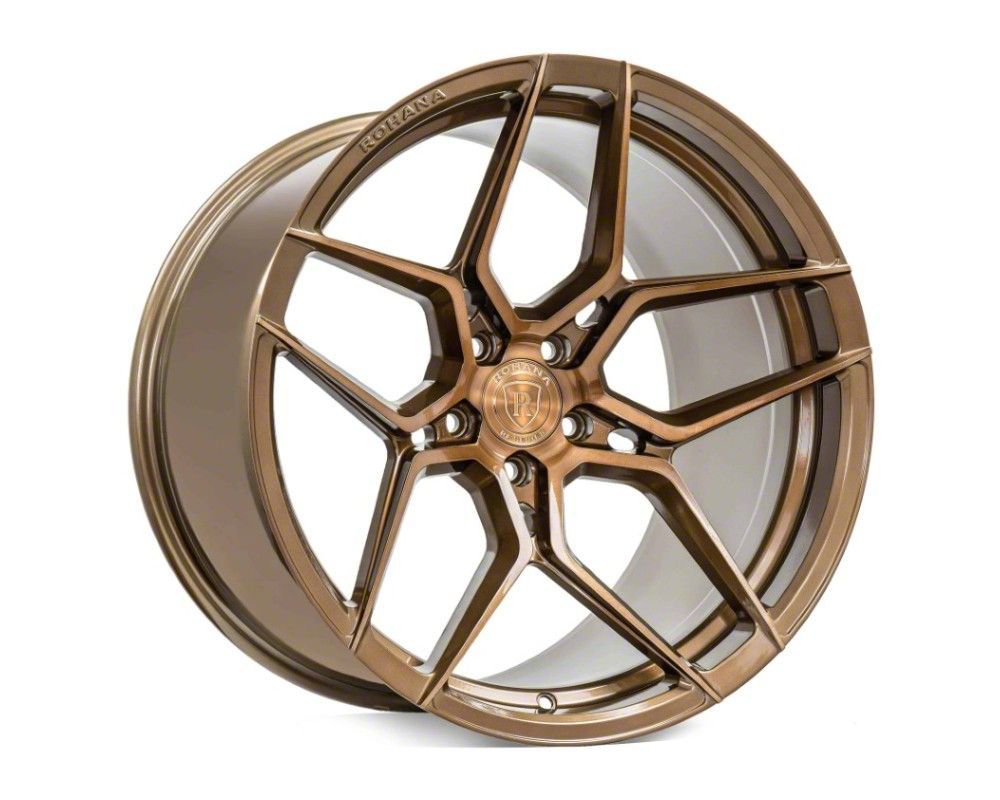
Wheel Types
- Forged Wheels: Lightest, strongest, most expensive. Best for performance — reduce unsprung weight. ~$300–$800 per wheel.
- Flow-Formed (Rotary Forged): Near-forged strength and weight at lower cost. Best value performance upgrade. ~$150–$400 per wheel.
- Cast Wheels: Standard aftermarket. Heavier. Fine for appearance upgrades. ~$80–$250 per wheel.
Offset Guide
- Stock offset: +18 to +25mm
- Going wider (negative offset): Wheels flush or poke — cosmetic, but may require fender rolling.
- Going narrower (positive offset): Wheels tuck — functional for clearance.
- Max rear width without modification: 295/40R20 rear, 275/40R20 front.
Tire Types
| Type | Best For | Tread Life | Wet Performance |
|---|---|---|---|
| All-Season Performance | Daily driving | 40,000–60,000 mi | Good |
| Summer Performance | Spirited driving | 20,000–40,000 mi | Excellent |
| Max Performance Summer | Track/hard driving | 10,000–20,000 mi | Excellent |
| Drag Radials | Strip launches | Very low | Poor (purpose-built) |
Drag Radials
- Used when launching at the drag strip to maximize grip with soft compound.
- Factory drag radial option on SRT Super Stock and 1320 models.
- Top speed limited to 168 mph with drag radials installed.
- Popular brands: Nitto NT555RII, Mickey Thompson ET Street R, Hoosier Quick Time Pro.
- Weld Racing wheels popular for dedicated drag setup.
Site UX Recommendations
- Bolt pattern (5x115mm) should be prominently shown.
- Weight saving per wheel shown — forged vs. cast matters for 0-60 and cornering.
- "Drag setup" vs. "Street/Track setup" filter.
- Note: drag radials are not street-legal in some jurisdictions.

10. DRIVETRAIN
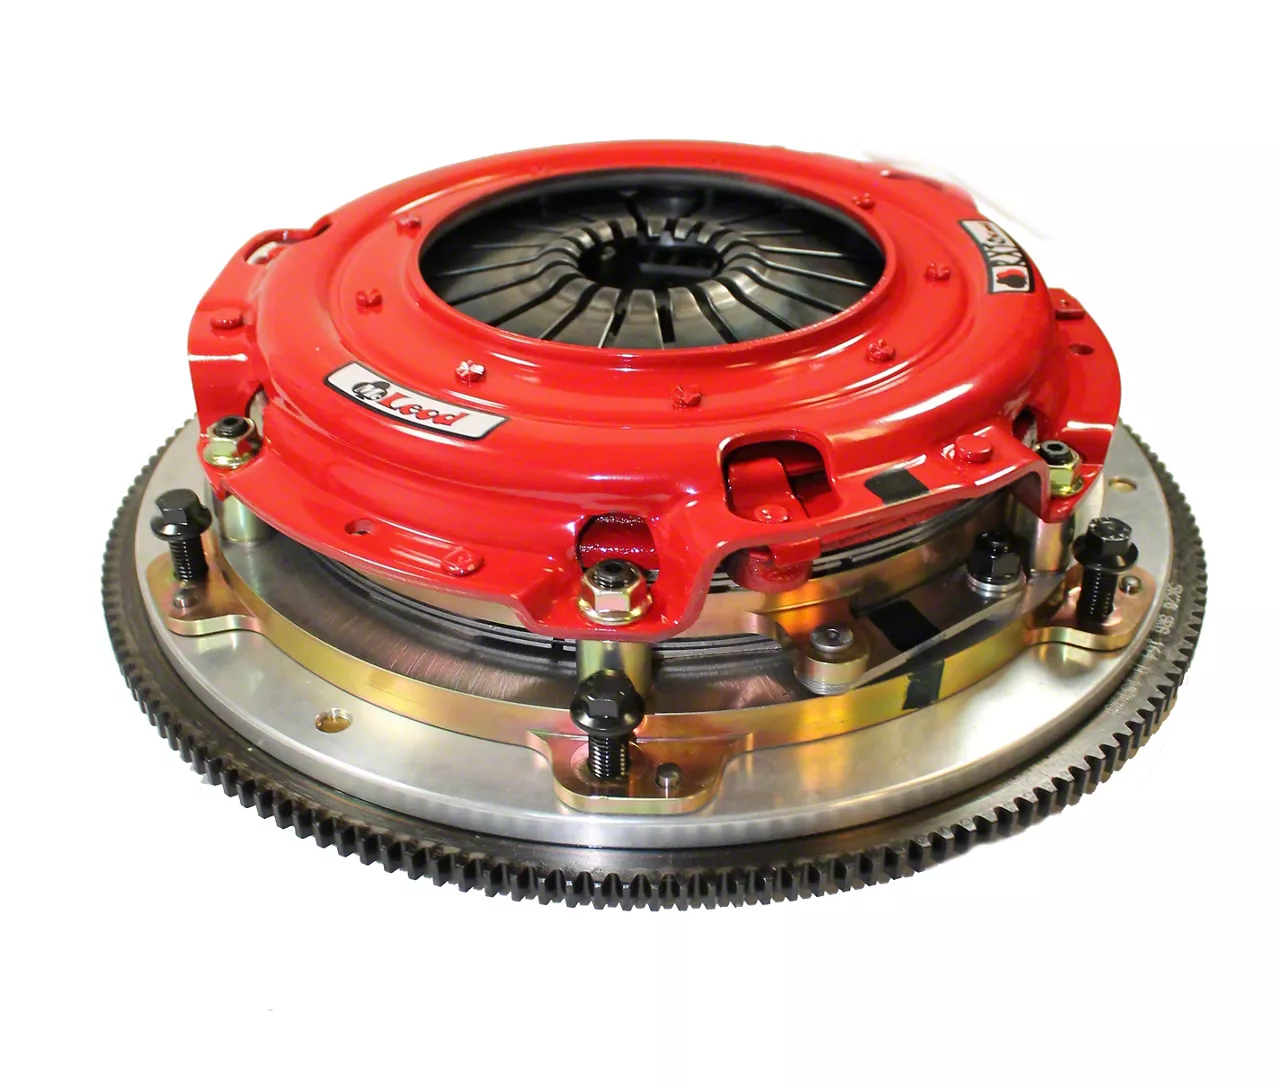
Clutch Kits (Manual Only)
- When needed: Build exceeds ~450–500 ft-lbs torque.
- South Bend Stage 2: Great street/strip balance. ~$650–$900.
- McLeod RST Twin Disc: For high-HP builds. ~$1,500–$2,200.
- Stock clutch: Handles stock power fine but will slip under boosted or cam'd builds.
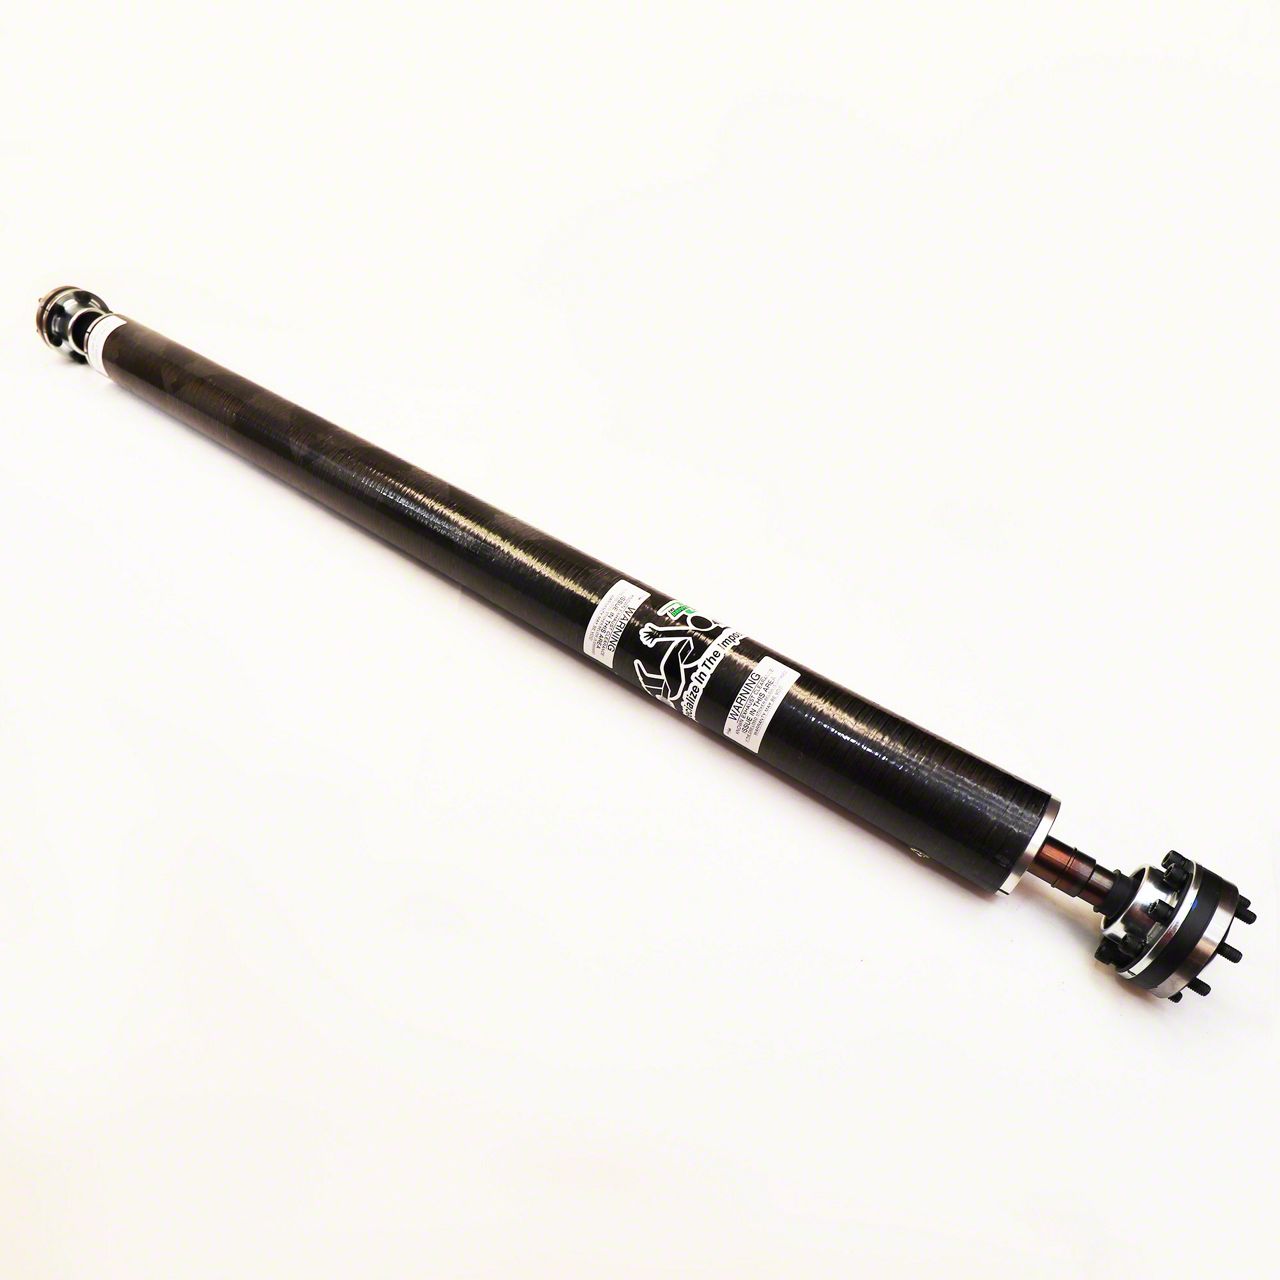
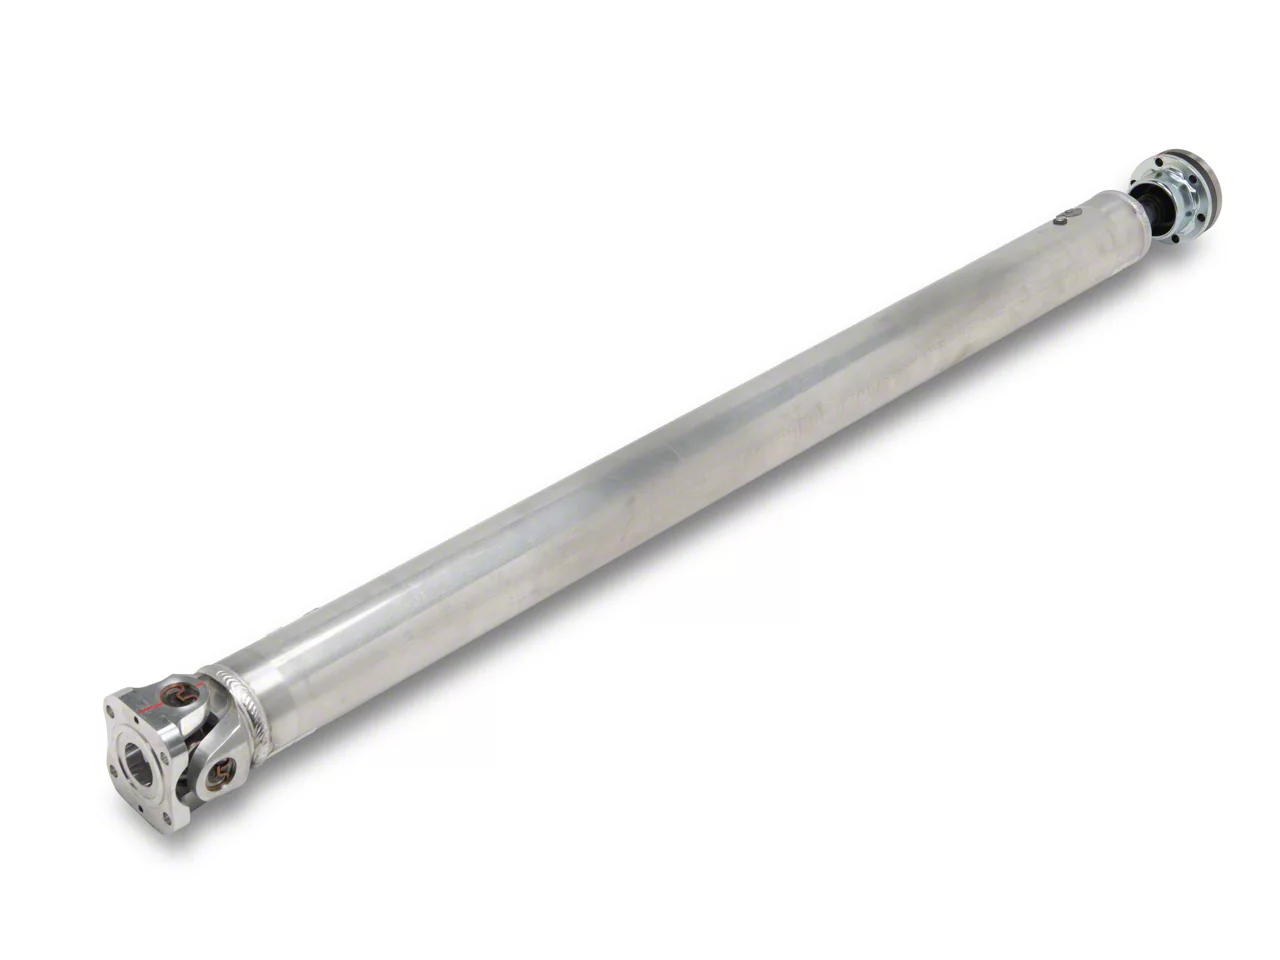
Driveshafts
- Stock driveshaft: Rated to approximately 600 HP before failure risk.
- Aluminum or carbon fiber one-piece driveshaft reduces rotational mass (improved acceleration).
- DSS Performance: Popular for Challenger one-piece aluminum shafts.
Differentials
- Factory rear differential handles most street builds.
- Limited-slip differential (LSD) upgrades significantly improve traction and launch consistency.
- Moser Engineering, Eaton TrueTrac: Popular LSD options.
Torque Converters (Automatic Only)
- Stock converter slips at high power under WOT.
- Circle D Specialties: Top-rated for the TorqueFlite 8HP70/90 automatic.
- Stall speed matched to cam profile or supercharger power band.
11. ENGINE INTERNALS (STAGE 3+)
When Internals Are Needed
- Naturally aspirated builds pushing past ~500 HP.
- Forced induction builds pushing past ~600–700 HP.
- Aggressive cam + headers + intake combo on the 5.7L.
Key Parts
- Forged Pistons: Replace stock cast pistons for boost/nitrous tolerance. Mahle, JE Pistons.
- Forged Rods: Replace stock rods for high-RPM/high-boost durability. Manley, Eagle.
- Head Gaskets: MLS (Multi-Layer Steel) head gaskets required for boost. Cometic.
- ARP Head Studs: Replace head bolts with studs for improved clamping force under boost.
12. PART SYNERGY CHAINS (What Stacks With What)
The Bolt-On Trio (+35–50 HP combined)
CAI → Cat-Back Exhaust → ECU Tune
Power Stack (+50–70 HP)
CAI → Throttle Body → Headers → Cat-Back → Tune
Full NA (Naturally Aspirated) Build (+80–120 HP on 6.4L)
Cam + Master Kit → Headers → Intake Manifold → Tune
Forced Induction Build (+150–250 HP)
Supercharger (Complete Kit) → Fuel Injectors → Fuel Pump → Tune
Handling Stack
Lowering Springs → Sway Bars (front + rear) → Strut Brace → Alignment
13. BUILD STAGES OVERVIEW
Stage 1: Bolt-Ons (~$1,500–$4,000, +30–60 HP)
Best first mods for any beginner. No major disassembly, shop time minimal.
- Cold Air Intake (~$350–$500)
- Cat-Back Exhaust (~$800–$2,000)
- ECU Tune (~$400–$700)
- Throttle Body upgrade (~$200–$400) [optional, more gains with tune]
- Throttle Response Controller (~$300) [immediate throttle feel improvement]
Stage 2: Supporting Mods (~$4,000–$10,000 total build, +70–120 HP)
Build upon Stage 1 with more aggressive parts.
- Long Tube Headers + Mid-Pipe (~$1,200–$2,000)
- Lowering Springs or Coilovers (~$300–$2,000)
- Brake upgrade (pads + rotors at minimum)
- Tune update for headers
Stage 3: Internals or Forced Induction (~$8,000–$20,000+ total, +150–300+ HP)
Serious build territory.
- Camshaft + Master Kit OR Supercharger Complete Kit
- Fuel system upgrades (mandatory for forced induction)
- Forged internals (for high-boost/high-RPM builds)
- Clutch upgrade (manual) or torque converter upgrade (auto)
- Custom tune (mandatory)
14. KEY COMPATIBILITY RULES SUMMARY
| Rule | Severity | Trigger | What Happens Without |
|---|---|---|---|
| Cam requires master kit | ERROR | Cam added to build | Engine failure (lifters, springs) |
| SC requires fuel upgrade | ERROR | Tuner Kit SC added | Lean condition → engine destruction |
| Long tube + factory mid-pipe | WARNING | LT headers without mid-pipe | Won't bolt up |
| Manual-only: clutch, shifter | INFO | Trans type mismatch | Part won't fit |
| Auto-only: torque converter | INFO | Trans type mismatch | Part won't fit |
| Clutch slip at 450+ ft-lbs | WARNING | Power threshold exceeded | Clutch slippage |
| Driveshaft at 600+ HP | WARNING | Power threshold exceeded | Driveshaft failure |
16. DRAG STRIP BUILD — DETAILED NOTES
Factory Drag Platform: The Scat Pack 1320
Dodge produced a factory drag-optimized variant — the Challenger R/T Scat Pack 1320 — with these from-factory drag features:
- Nexen SUR4G 275/40R20 drag radials (street-legal DOT-rated)
- TransBrake — holds the car against the drivetrain for a loaded launch release
- Torque Reserve — builds engine torque before launch for maximum hit
- Line Lock — front brake hold for burnout/tire warm-up
- Launch Assist — manages wheel spin off the line
- Asymmetrical limited-slip differential with 3.09 final drive ratio
- Extreme-duty 41-spline rear axle half shafts — rated for drag abuse
- SRT-tuned three-mode adaptive damping — softer/taller springs allow weight transfer to rear on launch
- Brembo high-performance brakes — factory equipment
- Factory ET: 11.70 sec @ 115 mph quarter mile, stock
Only 334 of the 2022 model were produced — a limited production drag-focused variant.
Key Drag Build Concepts for Any Challenger
- Weight transfer is everything at launch — softer rear springs and taller ride height encourage weight to squat to rear
- Drag radials > street tires — contact patch and compound make a night-and-day difference in 60-ft times
- Narrow front / wide rear ("skinnies") — reduces rotating mass on front, keeps weight over rear
- Automatic > manual for drag — TorqueFlite 8HP90 shifts faster than any driver; manual requires clutch skill
- Gear ratios matter — 3.09 final drive (1320) vs. standard 2.62; numerically higher = better launch, lower top speed
- Air-to-fuel safety — drag launches generate massive heat spikes; ensure fuel system is dialed before hard launches on boosted builds
Quarter-Mile Reference Times
| Build | ET | MPH |
|---|---|---|
| Stock Scat Pack | 12.0–12.4 sec | 113–115 mph |
| Scat Pack 1320 | 11.70 sec | 115 mph |
| Stage 1 bolt-ons (tune, CAI, cat-back) | ~11.4–11.8 sec | 117–120 mph |
| Long tubes + Stage 1 + drag radials | ~11.0–11.4 sec | 120–123 mph |
| Cam build (Stage 2 cam + full exhaust) | ~10.5–11.0 sec | 123–127 mph |
| Supercharged (Whipple/Magnuson) | ~9.5–10.5 sec | 130–140+ mph |
Site UX Recommendations
- "Drag Strip" build path tag on relevant parts (drag radials, driveshaft, TransBrake, short-shift kit)
- "1320 Compatible" badge for parts proven on the factory drag platform
- Weight reduction tip: every 100 lbs removed = ~0.1 sec improvement in ET
17. TRACK DAY / ROAD COURSE BUILD NOTES
Priority Order for Track Prep
Track prep is very different from drag strip prep — you need the whole car to work, not just go straight.
- Brakes first — always. Brake fade is the most dangerous failure mode on track. Upgrade pads to high-temp compound (Hawk HP Plus or DTC-60) before any other mod.
- Fluid flush — brake fluid absorbs moisture over time; boils at lower temps. Fresh DOT 4 or DOT 5.1 before every track event.
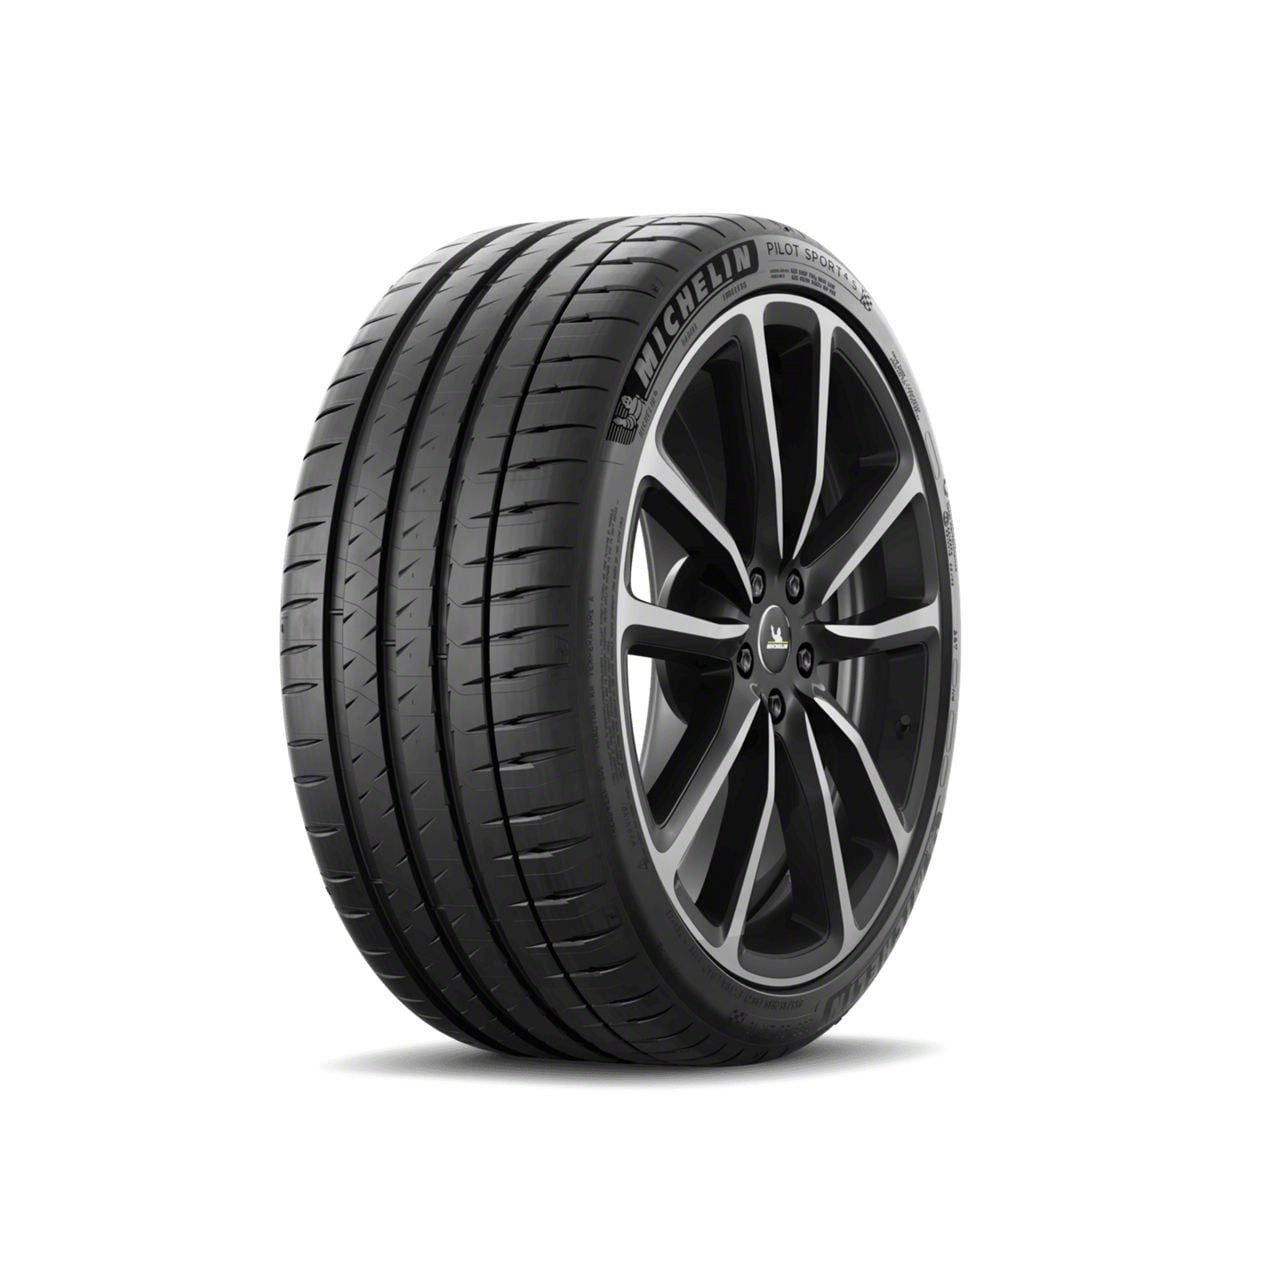
- Tires — grip is everything on a road course. 200tw performance tires (Michelin Pilot Sport Cup 2, Falken Azenis RT660) transform lap times.
- Alignment — track-optimized setup: front camber -2.5°, caster 8.0°/8.5°, toe -0.01°; rear camber -1.3°, toe +0.01°
- Coilovers — adjustable damping lets you tune for specific tracks
- Sway bars — biggest per-dollar handling improvement; front + rear kit transforms body roll
- Cooling — track sessions generate more heat than street driving. Engine coolant temp, transmission fluid temp, brake fluid all get stressed.
Cooling Mods for Track Use
- Catch can — prevents oil blow-by from accumulating as heat builds through long sessions
- Transmission cooler — automatic TorqueFlite gets hot in repeated hard acceleration
- Engine oil cooler — prevents oil viscosity breakdown on hot summer track days
- Brake cooling ducts — duct outside air directly to brake rotors; most important for repeated braking zones
Alignment Notes for Track
- More negative camber improves cornering grip by keeping the tire flat during body roll
- Stock alignment is near-zero camber — compromised for tire wear, not cornering
- Don't align to track spec if it's also a daily driver — aggressive camber eats tires on the street
- Corner balancing (distributing weight evenly across all four corners) maximizes grip — requires a shop with corner balance scales
Site UX Recommendations
- "Track Day" build path tag
- "Brake fluid flush recommended before track use" note on all track-oriented pads/rotors
- Alignment note on coilovers: "Professional alignment and corner balance recommended"
18. OIL CATCH CAN — DETAILED NOTES
The Problem: Crankcase Blow-By
All internal combustion engines generate "blow-by" — combustion gases that leak past the piston rings into the crankcase. The factory Positive Crankcase Ventilation (PCV) system vents these gases back into the intake manifold to be re-burned rather than released to atmosphere (emissions).
The problem: these gases carry oil vapour, water, and combustion acids. When they re-enter the intake, this oily mist coats:
- Intake tube
- Throttle body
- Intake manifold runners
- Back of the intake valves
Over time, especially on direct-injection engines (which don't have fuel washing the backs of the valves), this builds up as hard carbon deposits. The HEMI is a port-injected design (fuel sprays into the intake port, washing the valve stems somewhat), but deposits still accumulate significantly.
Consequences of Deposits
- Carbon on intake valves causes misfires, rough idle, hesitation
- Reduced valve sealing reduces compression slightly
- PCM retards timing to prevent pre-ignition from hot spots = power loss over time
- Oil in intake lowers octane of the incoming charge = detonation risk under boost
- On boosted builds, oil-laden air entering under boost can cause detonation
How a Catch Can Fixes It
A catch can installs in the PCV line, intercepting the blow-by gases before they reach the intake. Inside the can, baffles or steel mesh coalesce the oil droplets, which fall to the bottom of the can. Clean(er) air continues to the intake. The collected oil is drained periodically (every oil change interval is typical).
Quality Differences
- Cheap cans use simple chambers with no baffles — limited separation efficiency
- Quality cans (JLT, Billet Technology, Mishimoto) use multi-chamber baffle systems — 80-90% oil separation
- Size matters — larger reservoir means less frequent draining
How Much Collects?
Community reports from the HEMI 6.4L: 1–4 oz of oily sludge per 3,000 mile oil change interval. On supercharged cars, significantly more due to higher crankcase pressure under boost.
Brands and Options
- JLT Performance Oil Separator (J&L) — most popular for HEMI. Passenger-side and driver-side mount options for 5.7L, 6.4L, and 6.2L. Direct-fit, no fabrication.
- Billet Technology Signature Series — fully billet aluminum, premium look and function
- Mishimoto Baffled Oil Catch Can — well-reviewed, compact design
- BBK Performance Oil Separator — budget option, OEM-compatible
- Improved Racing — dedicated kit for 6.2L Hellcat/Redeye/Demon specifically
Site UX Recommendations
- "Recommended for all HEMI builds" badge
- Note on supercharger pages: "Catch can strongly recommended with any forced induction build"
- Engine-specific fitment: 5.7L / 6.4L / 6.2L kits are different
- Show how much collects in the can (photo testimonials resonate strongly)
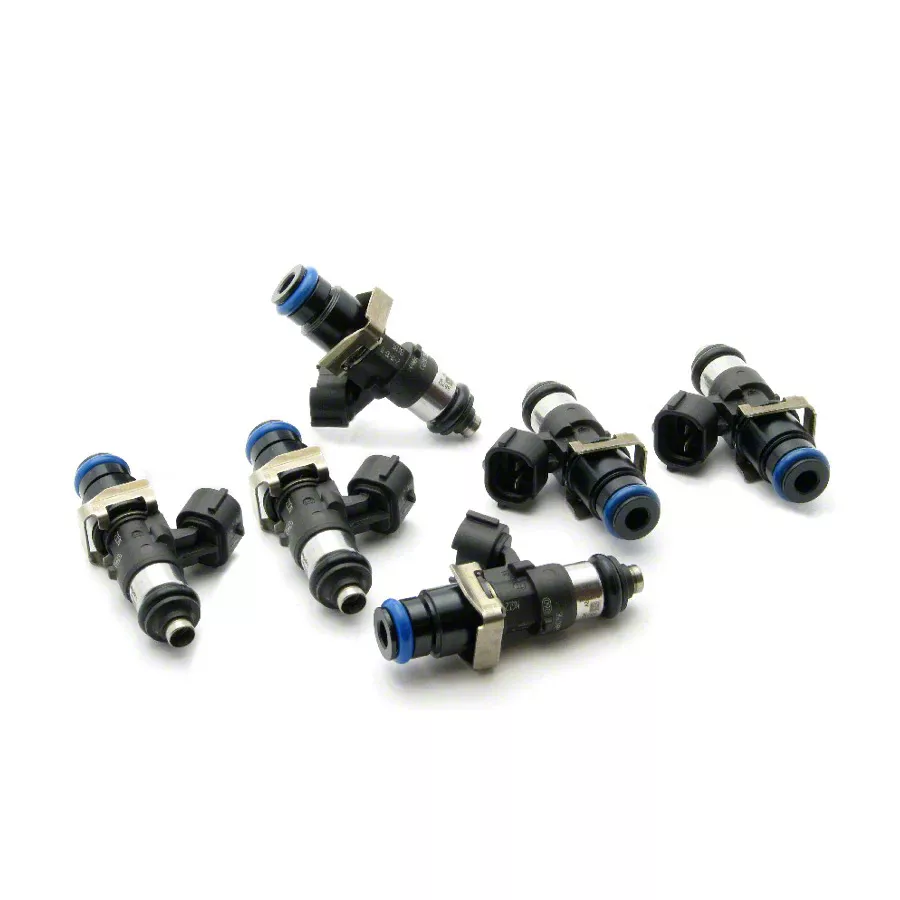
19. FUEL SYSTEM — INJECTORS AND PUMPS
When Do You Need Upgraded Injectors?
- Stock 5.7L injectors: ~24 lb/hr — sufficient for stock and mild bolt-ons
- Stock 6.4L injectors: ~30 lb/hr — sufficient for Stage 1–2, marginal at Stage 3 NA
- Stock 6.2L Hellcat injectors: ~62 lb/hr — sufficient for stock boost, upgrade needed for pulley + power mods
Rule of thumb: Injectors should be sized at 80% duty cycle max. At 100% duty cycle, you're "running lean" at the top end. For a supercharged build, calculate needed injector size: HP ÷ BSFC ÷ number of injectors × safety margin.
Injector Size Guide by Build
| Build Level | Target HP | Injector Size |
|---|---|---|
| Stock / Stage 1 bolt-ons | Up to 500 HP | Stock size (no change) |
| Stage 2 + mild cam | 500–600 HP | 60 lb/hr (DeatschWerks) |
| Supercharged (mild boost) | 600–750 HP | 1000cc (DeatschWerks, ID) |
| Supercharged (aggressive) | 750–900 HP | 1100cc–1500cc |
| E85 flex fuel builds | Any HP | 1300cc+ |
Key Brands
- DeatschWerks: Most popular HEMI injector brand. Every unit is matched on a flow bench before shipping. 1000cc, 1100cc, 1500cc options for HEMI. Direct drop-in fit.
- Injector Dynamics (ID): Premium matched injectors. ID1050x is popular for supercharged builds.
- Mopar/OEM-size options: Good for mild builds where you just want direct replacement quality
When Do You Need an Upgraded Fuel Pump?
The stock in-tank pump flows approximately 255 l/hr — fine for naturally aspirated up to ~500 HP. Under boost or at high RPM with aggressive injectors, the pump becomes the bottleneck.
Pump options:
- DeatschWerks DW300 (340 l/hr, drop-in replacement) — best value direct-fit pump upgrade
- Walbro 450 LPH — high-output option for high-boost builds
- Fore Innovations Triple Pump Hat — for extreme builds 900+ HP where one pump isn't enough
- Boost-A-Pump (BAP) — increases voltage to stock pump temporarily under boost; band-aid solution but works for mild setups
Flex Fuel / E85 Notes
E85 ethanol has lower energy density than gasoline but higher octane (~105 RON). Running E85 requires:
- Injectors sized ~30% larger than gasoline-only equivalents
- Fuel pump capable of higher volume
- E85-compatible fuel rails and lines
- Custom tune for E85 fueling tables
- Flex fuel sensor (if running pump gas + E85 blend)
On E85, a supercharged HEMI can see 30–50+ HP over the same pump-gas tune due to higher octane and charge cooling from ethanol evaporation.
Site UX Recommendations
- Injector sizing calculator concept: "Enter your target HP and engine → see recommended injector size"
- "Required with supercharger" badge on injectors and pumps in the context of SC kits
- E85 compatibility clearly marked on fuel parts that support it
20. HELLCAT-SPECIFIC MODIFICATIONS
Why Hellcat Mods Are Different
The 6.2L Hellcat already has a factory supercharger (Eaton TVS 2.4L on standard Hellcat, 2.7L on Redeye/Demon). "Adding boost" means upgrading the existing blower, not installing a new one. The fuel system is already upgraded from stock HEMI spec, but still needs attention for aggressive power levels.
Factory Hellcat Power
- Standard Hellcat: 717 HP / 656 lb-ft (2.4L Eaton blower, ~11.6 PSI)
- Hellcat Redeye: 797 HP (same 2.7L blower from Demon, higher boost)
- Super Stock: 807 HP
- Demon 170: 1,025 HP (on E85) — highest production car HP ever at launch
Bolt-On Mods (Hellcat Standard)
1. Pulley Swap — Biggest Bang for Buck
Reducing the supercharger pulley size spins the blower faster, making more boost. Every PSI of boost on a Hellcat = ~30–50 WHP.
- 3.1" upper pulley + tune: ~50 WHP gain — safe, street-driveable
- 2.82" upper pulley + 775cc injectors + Boost-A-Pump: ~100 WHP gain
- 2.64" upper + ATI lower pulley + 1000cc injectors + dual pump: ~150–200 WHP on E85
2. Cold Air Intake
JLT Intakes and Legmaker Intakes (carbon fiber) are the community favorites. Also makes the supercharger whine louder — a bonus for Hellcat owners.
3. Ported Supercharger Snout
SDG Performance porting service: ~50 WHP and ~2 PSI boost gain. Smooths and enlarges internal passages for better airflow. Pairs well with a Nick Williams 108mm throttle body.
4. Heat Exchanger Upgrade (Interchiller)
The Hellcat uses a water-to-air intercooler on top of the supercharger. Under repeated hard acceleration, the coolant in this system heat-soaks, reducing the intercooler's effectiveness and causing power to drop ("heat soak"). The IC Chiller system chills the intercooler coolant between runs for consistent power.
5. Catch Can — essential, same as other HEMIs, arguably more important under boost
Higher-Power Hellcat Upgrades
- Full Whipple 3.0L+ swap — replaces Eaton with Whipple unit. +200–300 WHP with full fuel support
- Magnuson TVS2650 swap — similar to Whipple route
- Driveshaft Shop CV driveshaft — handles 1,000+ HP; stock driveshaft is a known weak point at aggressive power levels
- Built transmission — stock 8HP90 handles bolt-ons; above 900 HP, a built trans (Sipple Speed, etc.) with reinforced clutch packs is recommended
- Differential brace — DIRS brace prevents diff failures at high power
- Wavetrac LSD — upgraded limited-slip for better traction distribution
Key Insight for Site
The Hellcat modification tree is completely different from N/A builds. Someone buying for a Hellcat should see Hellcat-specific parts, not generic HEMI parts that may not fit the blower manifold. Engine-size filtering and trim-level compatibility are critical here.
21. SUPERCHARGER TYPES — DETAILED COMPARISON
Positive Displacement (Roots / Twin-Screw)
Examples: Whipple Gen 5 (twin-screw), Magnuson TVS (twin-screw), Edelbrock E-Force (roots)
How it works: Two counter-rotating rotors trap air between their lobes and push it forward into the intake. Unlike centrifugal designs, positive displacement superchargers move a fixed volume of air per rotation — meaning boost is available from idle.
Power characteristics:
- Full boost available from low RPM
- Flat, broad torque curve — power feels immediate and relentless
- Better low-to-mid range than centrifugal
- Slightly less peak top-end power vs centrifugal at same boost level
- More parasitic drag (requires more engine power to spin)
- Higher intake charge temperature (more heat generated by compression) — intercooling important
Driveability: Easy to drive. No "hit" or surge — power builds smoothly from the moment you press the throttle. Best for street cars, daily drivers, people who want tractable power.
Sound: Distinctive whine/howl that increases with RPM. The stereotypical "supercharger sound."
Centrifugal
Examples: ProCharger P-1SC-1 / D-1SC, Vortech V-3 Si
How it works: Like a turbocharger but belt-driven instead of exhaust-driven. A centrifugal impeller spins at very high speed and uses centrifugal force to compress air. Boost output increases with the square of rotational speed — meaning it builds with RPM.
Power characteristics:
- Little boost at low RPM, builds as RPM climbs
- Strong top-end power — keeps pulling through the redline
- Better peak power numbers at high RPM
- Less torque at low RPM compared to positive displacement
- More efficient (less heat generated, less parasitic drag)
- Better for already-fast builds where you want top-end horsepower
Driveability: Different feel from positive displacement. Cars that have traction issues (rear-wheel drive on street tires) can actually be easier to launch with centrifugal because power builds gradually. Less likely to immediately overwhelm traction.
Sound: Turbo-like whistle that builds with boost. Less dramatic than positive displacement whine.
Side-By-Side Comparison
| Positive Displacement | Centrifugal | |
|---|---|---|
| Low-end torque | Excellent | Moderate |
| Top-end power | Good | Excellent |
| Power onset | Immediate | Progressive |
| Heat generation | Higher | Lower |
| Sound | Whine | Whistle |
| Complexity | Replaces intake manifold | Mounts externally |
| Best use case | Street / daily driver | Track / high RPM |
| Examples | Whipple, Magnuson | ProCharger, Vortech |
Site UX Recommendations
- Filter supercharger kits by type: "Positive Displacement" vs "Centrifugal"
- Explain the power delivery difference in layman terms on each listing
- Show a "best for" tag: "Best for street driving" vs "Best for track/top speed"
22. IGNITION SYSTEM UPGRADES
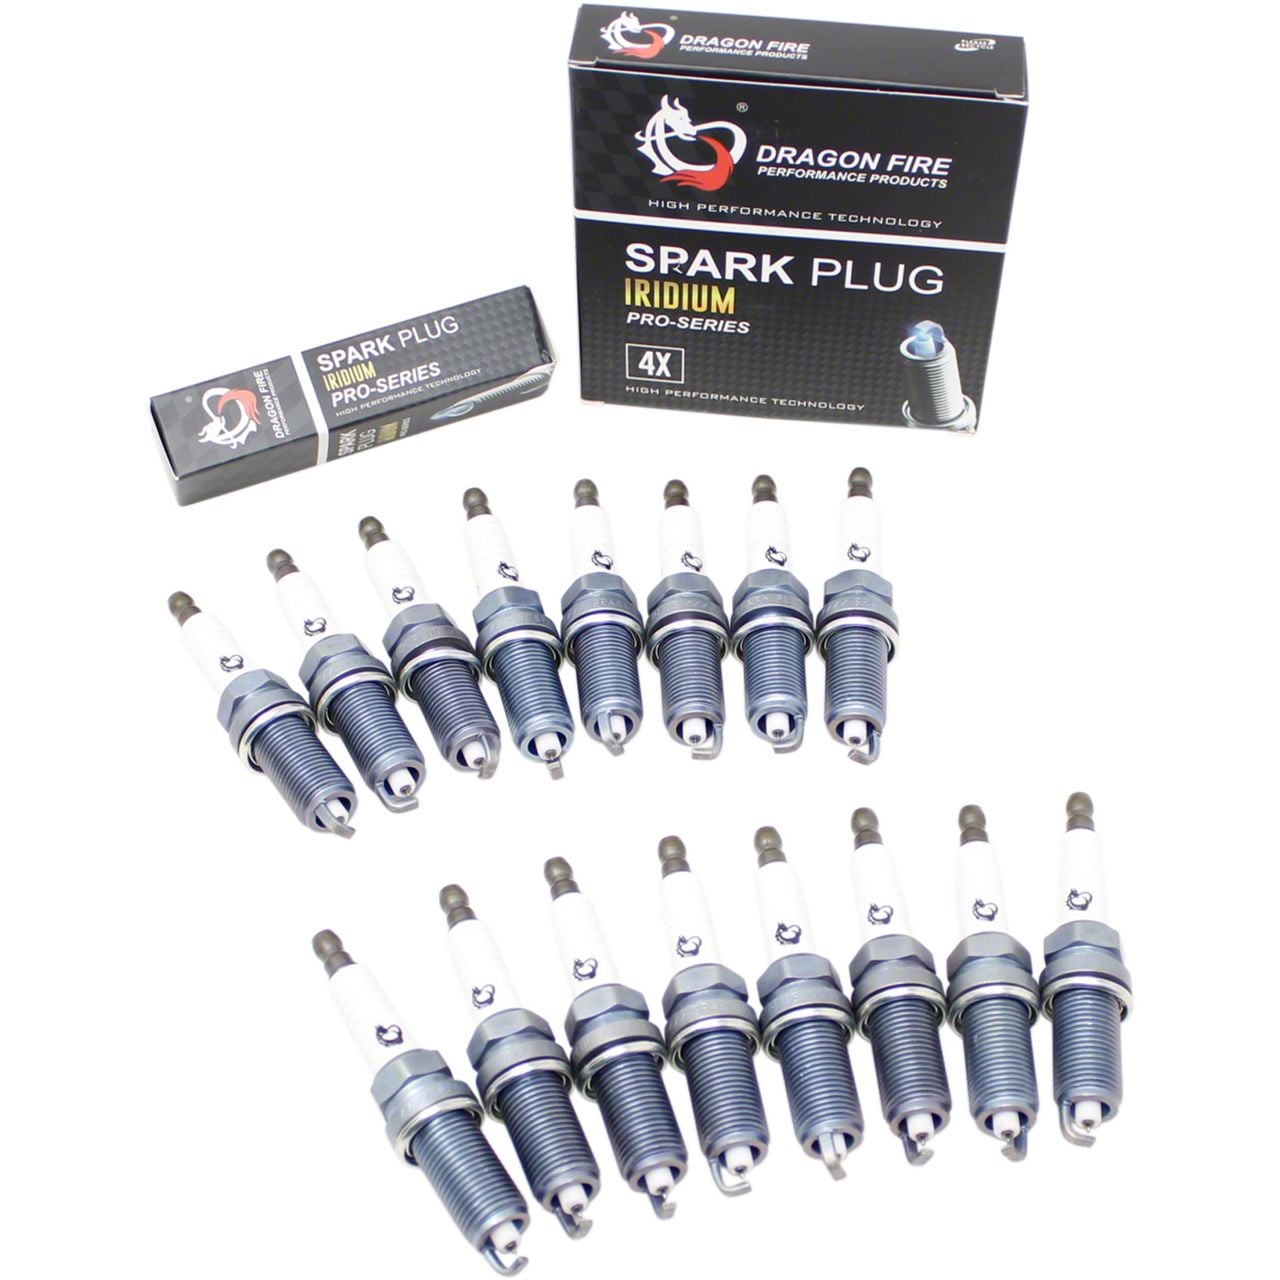
The HEMI's Unique Setup: Dual Spark Plugs Per Cylinder
The Gen III HEMI is famous for its dual-plug design — two spark plugs per cylinder, totaling 16 plugs in the V8. One plug sits centrally in the combustion chamber; the other is in an offset position. Both fire simultaneously for more complete combustion and the ability to run either plug as the primary if one fails.
Implication: When you buy spark plugs, you need 16 plugs (not 8). Budget and installation time are double what you'd expect for a typical V8.
Stock vs. Aftermarket Plugs
| Type | Gap (N/A) | Gap (Boosted) | Interval | Best For |
|---|---|---|---|---|
| Stock OEM copper | 0.044" | N/A | 30,000 mi | Stock, economical |
| NGK Iridium IX | 0.044" | 0.028–0.032" | 60,000+ mi | Street, longevity |
| Denso Iridium | 0.044" | 0.028–0.032" | 60,000+ mi | Street, OEM quality |
| NGK Ruthenium | 0.044" | 0.028–0.032" | 60,000+ mi | Best overall |
| Colder plugs (e.g. NGK one step colder) | Slightly tighter | Tighter still | Varies | Boosted, cam builds |
Why colder plugs for boosted builds: Combustion temperatures are higher under boost. A "hotter" plug (with more electrode exposed to combustion) can pre-ignite under these conditions — called "plug firing." A one-step-colder plug has more insulated electrode, dissipates heat faster, and prevents pre-ignition.
Gap tightening under boost: Boost pressure physically opposes the spark. Tighter gaps require less voltage to fire reliably under high cylinder pressure. A boosted engine at 10 PSI may need the gap reduced from 0.044" to 0.030–0.032" to prevent misfire.
Ignition Coils
The HEMI's stock coil packs are reasonably robust. The community consensus is that coil upgrades offer modest gains on N/A engines but become more meaningful on:
- Cam builds (harder to ignite under aggressive timing changes)
- Boosted builds (higher cylinder pressure requires more spark energy)
- High-RPM builds (coils have less dwell time to recharge between firings)
aFe Power Ignition Coils: Up to 20% more spark energy over stock. Direct plug-in replacement.
MSD Blaster Coils: Popular choice; allows slightly larger plug gaps for better combustion.
Recommended Spark Plug Change Interval
- Stock copper: every 30,000 miles
- Iridium/platinum: every 60,000 miles (or sooner with cam/boost modifications)
- After any significant tune change: inspect plugs to read combustion conditions
Site UX Recommendations
- Prominently note "Set of 16 plugs required" on HEMI spark plug listings
- Boosted-build note: "Running boosted? You need colder-range plugs"
- Gap guide by application: stock / mild mods / supercharged

23. EXTERIOR & AERO MODS — WHAT'S FUNCTIONAL VS. COSMETIC
The Honest Answer for Street Speeds
At typical street speeds (below 80–100 mph), most aftermarket aero parts on the Challenger are primarily cosmetic. Real aerodynamic effects require higher speeds — most production cars don't generate meaningful downforce until 100+ mph.
That said, some parts offer genuine benefits even at street speeds, and all have aesthetic value.
Part-by-Part Breakdown
Rear Spoiler
- At street speeds: Almost entirely cosmetic. Marginal downforce benefit.
- At track speeds (100+ mph): Creates rear downforce, but without a front splitter, unbalances the aero — lifts the front relative to rear.
- Community verdict: Buy it for looks; don't expect handling transformation.
- Factory spoiler (SRT style) is very popular OEM upgrade on R/T and base trims.
Front Splitter / Chin Spoiler
- Functional benefit even at lower speeds: blocks airflow under the car, reduces front lift
- Of all aero mods, splitters have the best real-world performance benefit-to-cost ratio
- Protects the front bumper from speed bump/driveway scrapes
- Popular options: APR Performance, SpeedKore carbon fiber
Rear Diffuser
- Genuinely cosmetic at street speeds. Works by managing air exiting from under the car — only effective if the underbody has been prepared to direct air to it
- On a stock ride-height Challenger with no splitter and no underbody work: cosmetic
- Community consensus: "Rear diffuser without a front splitter does nothing aerodynamically"
- Still looks great — buy if you want the look
Side Skirts
- Complete the visual package
- At speed, seal the gap between splitter (front) and diffuser (rear), reducing underbody turbulence
- Effective as part of a complete aero package, cosmetic on their own
Performance Hood (Heat Extractor)
- Functional benefit: A vented or scooped hood extracts hot air from the engine bay, which would otherwise heat-soak the intake air
- Best benefit on hot-climate drivers and on forced-induction builds where underhood temps are higher
- Carbon fiber hoods save 15–25 lbs over stock fiberglass — meaningful weight reduction
- Popular: Cervini's, Anderson Composites carbon fiber hoods
Aero Synergy Rule
Aero parts work as a system. The most effective order:
- Front splitter (most standalone value)
- Rear spoiler (balances the front splitter's downforce)
- Side skirts (connects the two)
- Rear diffuser (completes underbody management)
Installing #4 without #1 is the wrong order.
Site UX Recommendations
- "Functional" vs. "Cosmetic" badge on exterior parts
- Aero system suggestion: "Pair this rear spoiler with a front splitter for balanced downforce"
- Carbon fiber weight savings displayed: "-18 lbs vs. stock"
- Speed rating: "Aerodynamic benefits most noticeable at 80+ mph"